

How To Install A Drip Edge On A Metal Roof
So you're a homeowner and planning a DIY metal roofing installation. As you might anticipate, the most difficult role of the job is installing the trim correctly. Homeowners like you always inquire us which piece of metallic covering trim should exist installed first? Eave trim, also referred to as drip border, is the kickoff piece of trim that will be installed on your metal roof. This stride by pace installation article specifically covers eave trim installation for an exposed fastener panel such as: ⅞" Corrugated, R Panel/PBR Panel, and Western Rib/vii.two Panel. Information technology is non intended for installation of standing seam panels. Easy to follow instructions and pictures that illustrate each footstep. This weblog will reply all of your installation questions. We also accept a video that volition walk you through all of the steps. Our staff at Western States Metal Roofing consists of employees who take experience selling and installing metallic roofing. Our goal in this article is to take our 25 years of experience and share that cognition, making your metal roof installation a cakewalk. Our goal in this article is to explicate: If y'all savour this article then nosotros recommend that you read this article also: How To Install Synthetic Underlayment On A Metal Roof Eave trim is the metal flashing that covers the depression side of the edifice. Simply put, it'south installed on the side of the building that follows the pitch of the roof. Eave trim is used when a gutter is not required. The lesser leg of the eave trim has a kick out that is designed to keep water away from the wall. Eave trim is likewise referred to as baste edge or eave flashing. The purpose of a baste edge or eave trim is to divert rainwater off of the roof and away from the fascia. If you have a gutter it volition direct the water into the center of the gutter. If the baste edge is not positioned correctly it can cause the gutters to overflow. A drip edge will likewise make your roof look nicer as it provides a straight and clean line at the low side of your roof. The eave trim will work in conjunction with your underlayment and it will keep h2o from blowing underneath your roof. In add-on, there is a boot out at the border of the eave trim that is designed to steer the water out and away from your property. The kick out prevents the water from dripping directly downward the side of the fascia or wall. So, the short answer is "Yep" your roof does demand a drip edge. It makes the roof look cleaner, keeps the water from getting underneath your roof, protects your fascia lath from the elements, and it diverts water to the center of your gutter. If you did not install an eave trim your roof is more probable to leak, meaning you might have to paint and replace your fascia board more often, and the color of your stucco or walls will fade more quickly. The cost of the eave trim volition depend upon the guess, blazon of paint finish, and the size of the eave trim. On average eave trim will price $i.25 to $2.50 per lineal foot. A total size eave trim in PVDF would exist at the high side of this range. While a 26 gauge mini eave in a galvalume end would be on the low side. Installing eave trim on your metal roof starts with using the correct tools and having the correct supplies on hand. Here is a list of what y'all will need: You should always read the manufacturers installation guide prior to installing baste edge on a metal roof. Information technology'due south too important to exist in compliance with local building code requirements. It's always easiest to work from left to correct. So start with the left corner of the roof and then start overlapping the eave trim as you work your way to the far correct side of the roof. Eave trim is typically 10 feet to twelve feet in length and almost roofs will be larger than twelve anxiety. When this happens the eave flashing will have to exist overlapped. How do you lot ensure that your roof is protected from the elements if your roof is ready before the trim and metal panels arrive at the jobsite? Roofers volition "dry-in" a roof prior to the installation of the metallic roofing. This is curt for dry out inside. It means that the roofing underlayment has been installed protecting your roof and making information technology weather condition tight. Roofing underlayment should be installed prior to installation of eave flashing. The baste edge or eave trim will sit on top of the roofing underlayment. This keeps air current driven rain from getting underneath the underlayment. In addition, cut an eight inch strip of Sharkskin Ultra SA underlayment and install it over the eave flashing as shown in the picture and video. Once this is done you volition take underlayment both underneath and over the eave trim. Installing eave flashing isn't that difficult. Later you watch the videos and read the commodity you lot should non accept any problems. If yous are learning about eave trim installation then the next step is to learn about gable trim and ridge cap installation. Bank check out our metal covering installation guides, view our YouTube channel, and our blog. Since you are learning about installing metal covering panels you have either purchased metal covering or will be ordering before long. If you have not ordered the metal covering panels, you can save xv% to 50% by buying from a manufacturer directly. When you lot purchase metallic roofing from Western States Metal Roofing you lot are ownership manufacturer direct. There are no middle men involved. Nosotros offer inexpensive delivery throughout the entire Usa and will provide excellent client service. But don't have our word for it, you can come across what customer ratings and reviews online here. 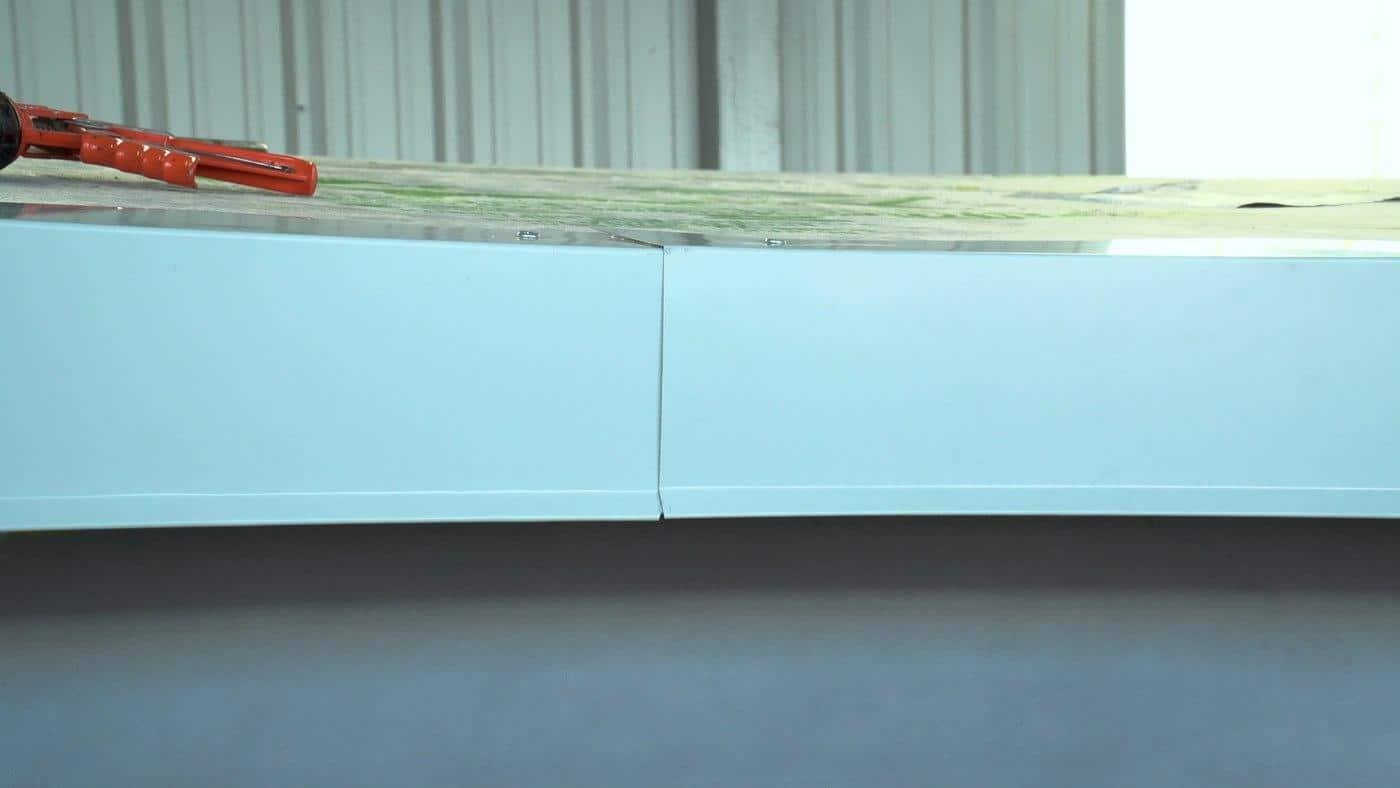
What Is Eave Trim?
Does A Metallic Roof Need A Drip Border?
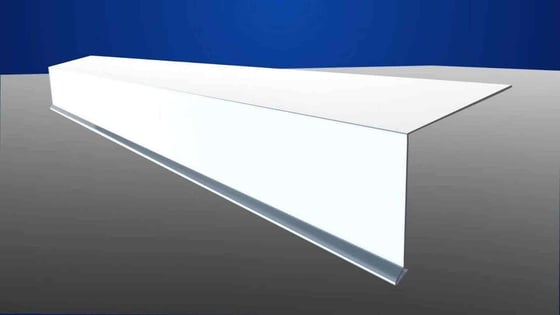
Types Of Eave Trim
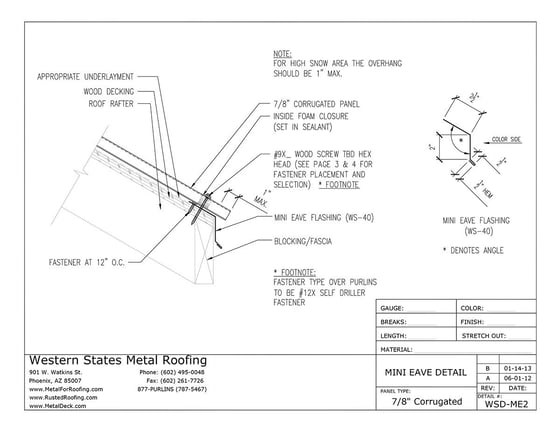
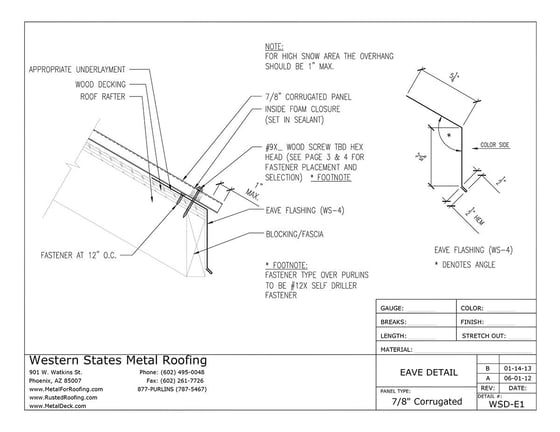 Eave trim can also be made to custom measurements. About residential projects will use mini eave trim and commercial projects tend to use a full size eave. Either will work fine. It just depends on how much of the fascia board you would like to cover.
 How Much Does Eave Trim Cost
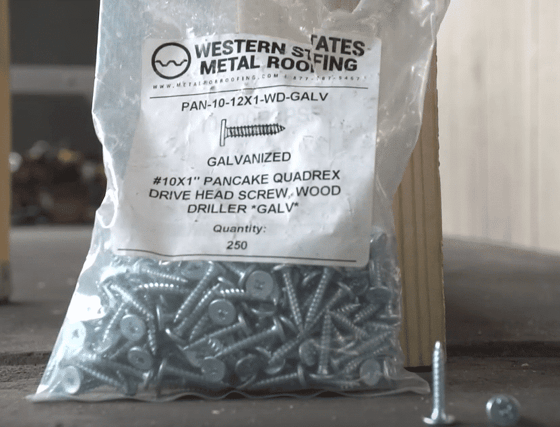
What Tools And Supplies Are Needed For Eave Trim Installation?
Installing Eave Trim On A Metal Roof: A Step By Step Guide
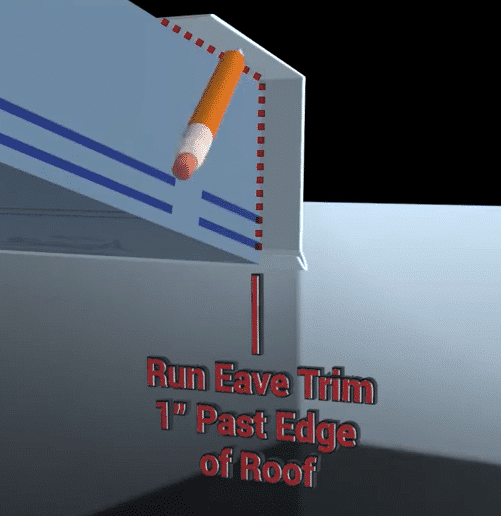
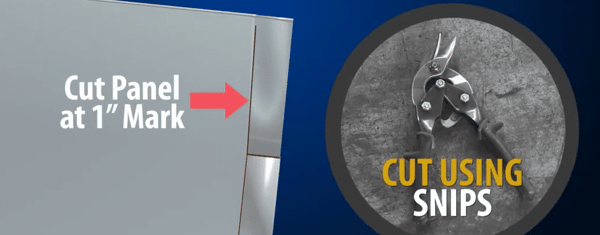
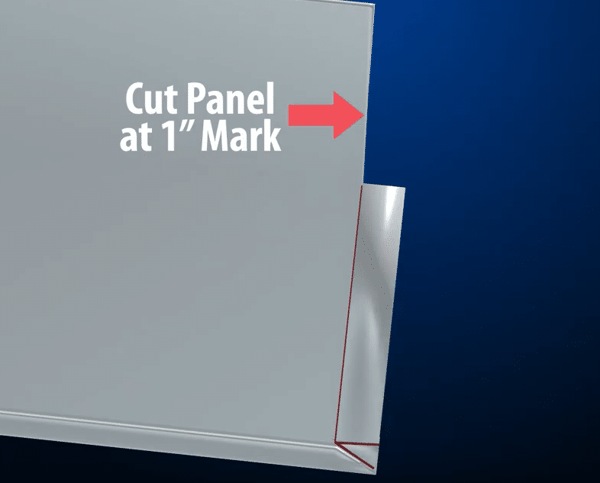
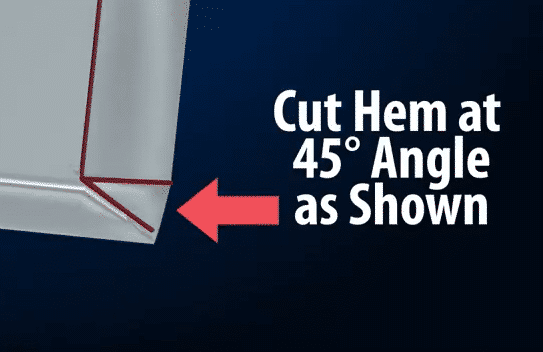
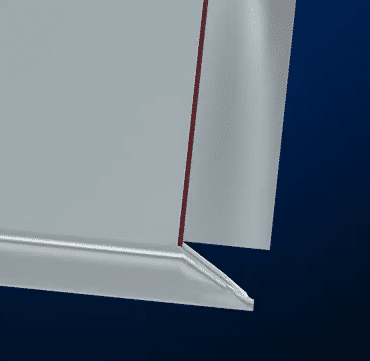
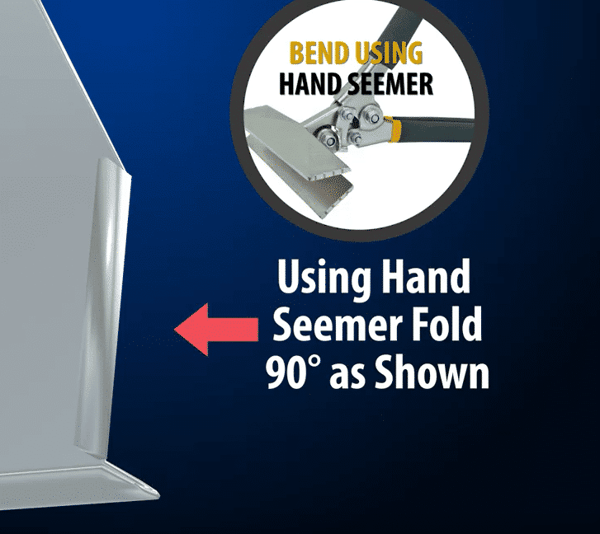
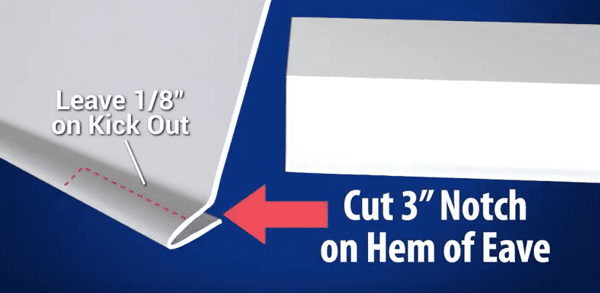
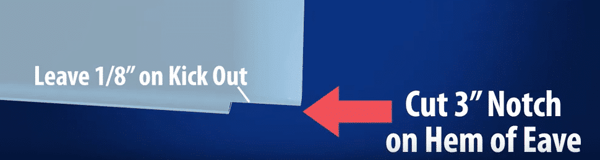
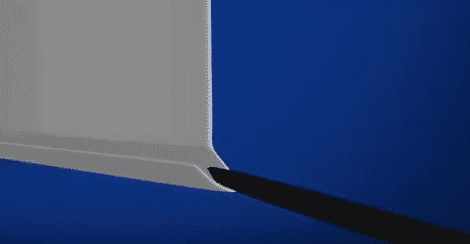
How To Install Eave Trim At A Corner

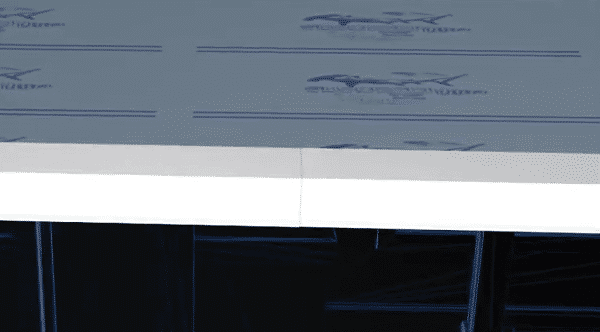
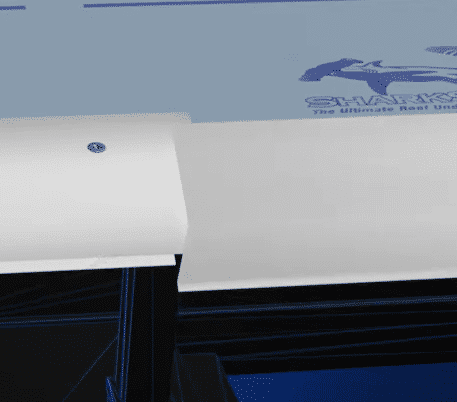
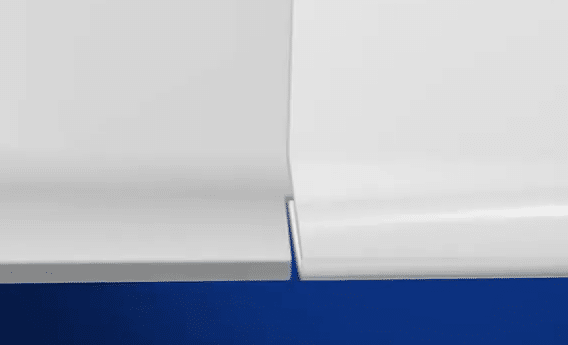
How To Overlap Eave Trim On A Metal Roof
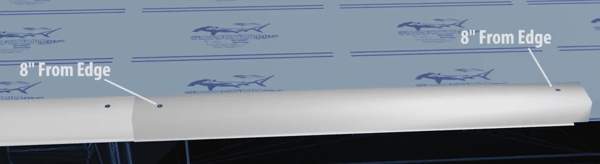
How To Fasten Eave Trim On A Metal Roof

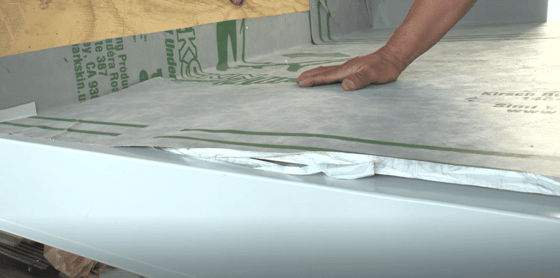
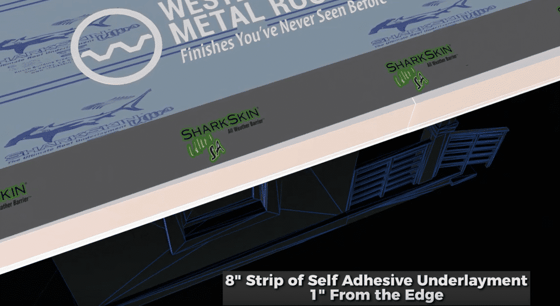
Installing Constructed Roofing Underlayment At The Eave Of A Metal Roof
Does Drip Edge Go Over Or Under The Synthetic Roofing Underlayment?
Learn How To Install Gable Flashing And Ridge Cap

Save Money On Your Metal Roofing Panels


Source: https://www.westernstatesmetalroofing.com/blog/install-eave-trim-metal-roof
Posted by: kennedypheine1997.blogspot.com
0 Response to "How To Install A Drip Edge On A Metal Roof"
Post a Comment